As an expert on our platform, you have the ability to create tailored offers for your clients based on their specific needs. This feature allows you to provide personalized service and pricing. Here's how to create and send a custom offer:
1. Initiating the Custom Offer
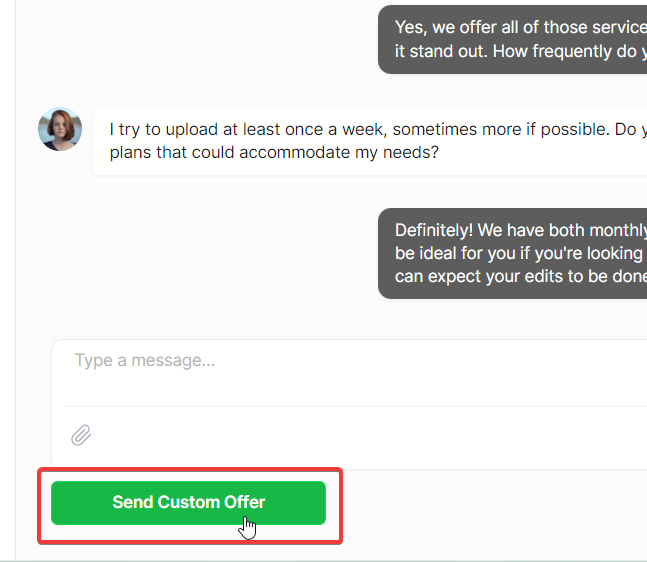
- During your conversation with a client, you'll see a green "Send Custom Offer" button at the bottom of the chat interface. Click this button to open the custom offer form.

2. Filling Out the Custom Offer Form
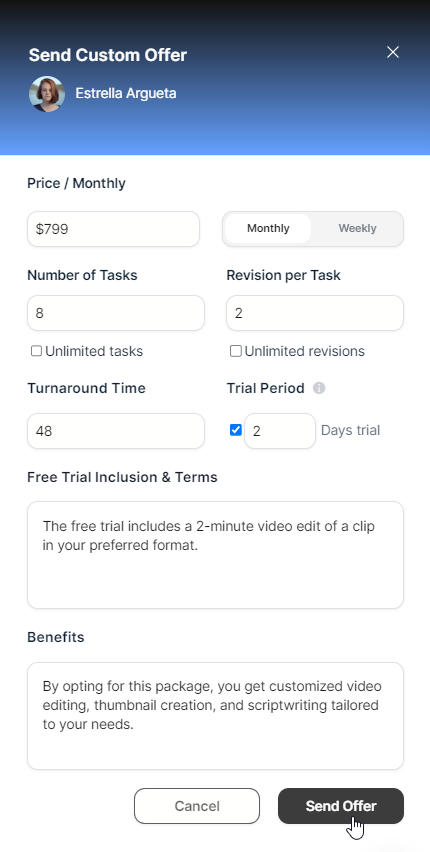
- When you click "Send Custom Offer," a side panel will appear with various fields to customize your offer:
- Price: Enter the price for your services.
- Billing Cycle: Choose between Monthly or Weekly billing.
- Number of Tasks: Specify how many tasks are included in the offer.
- Revisions per Task: Set the number of revisions allowed for each task.
- Turnaround Time: Indicate the expected completion time (in hours).
- Trial Period: Set a trial period if applicable (e.g., 2 days).

3. Additional Options
- You can check boxes for "Unlimited tasks" or "Unlimited revisions" if applicable.
- There's a section to describe what's included in the free trial.
- You can also list the benefits of choosing this package.
4. Sending the Offer
- Once you've filled out all the necessary information, click the "Send Offer" button at the bottom of the form to submit your custom offer to the client.
5. Client Review
- The client will then receive your custom offer and can choose to accept or decline it.
By using this feature, you can create offers that are perfectly tailored to each client's needs, potentially increasing your chances of securing their business.
Remember to always communicate clearly with your clients about what's included in your offer and be prepared to answer any questions they might have about the terms or services provided.